Solving a HyperGogen Puzzle
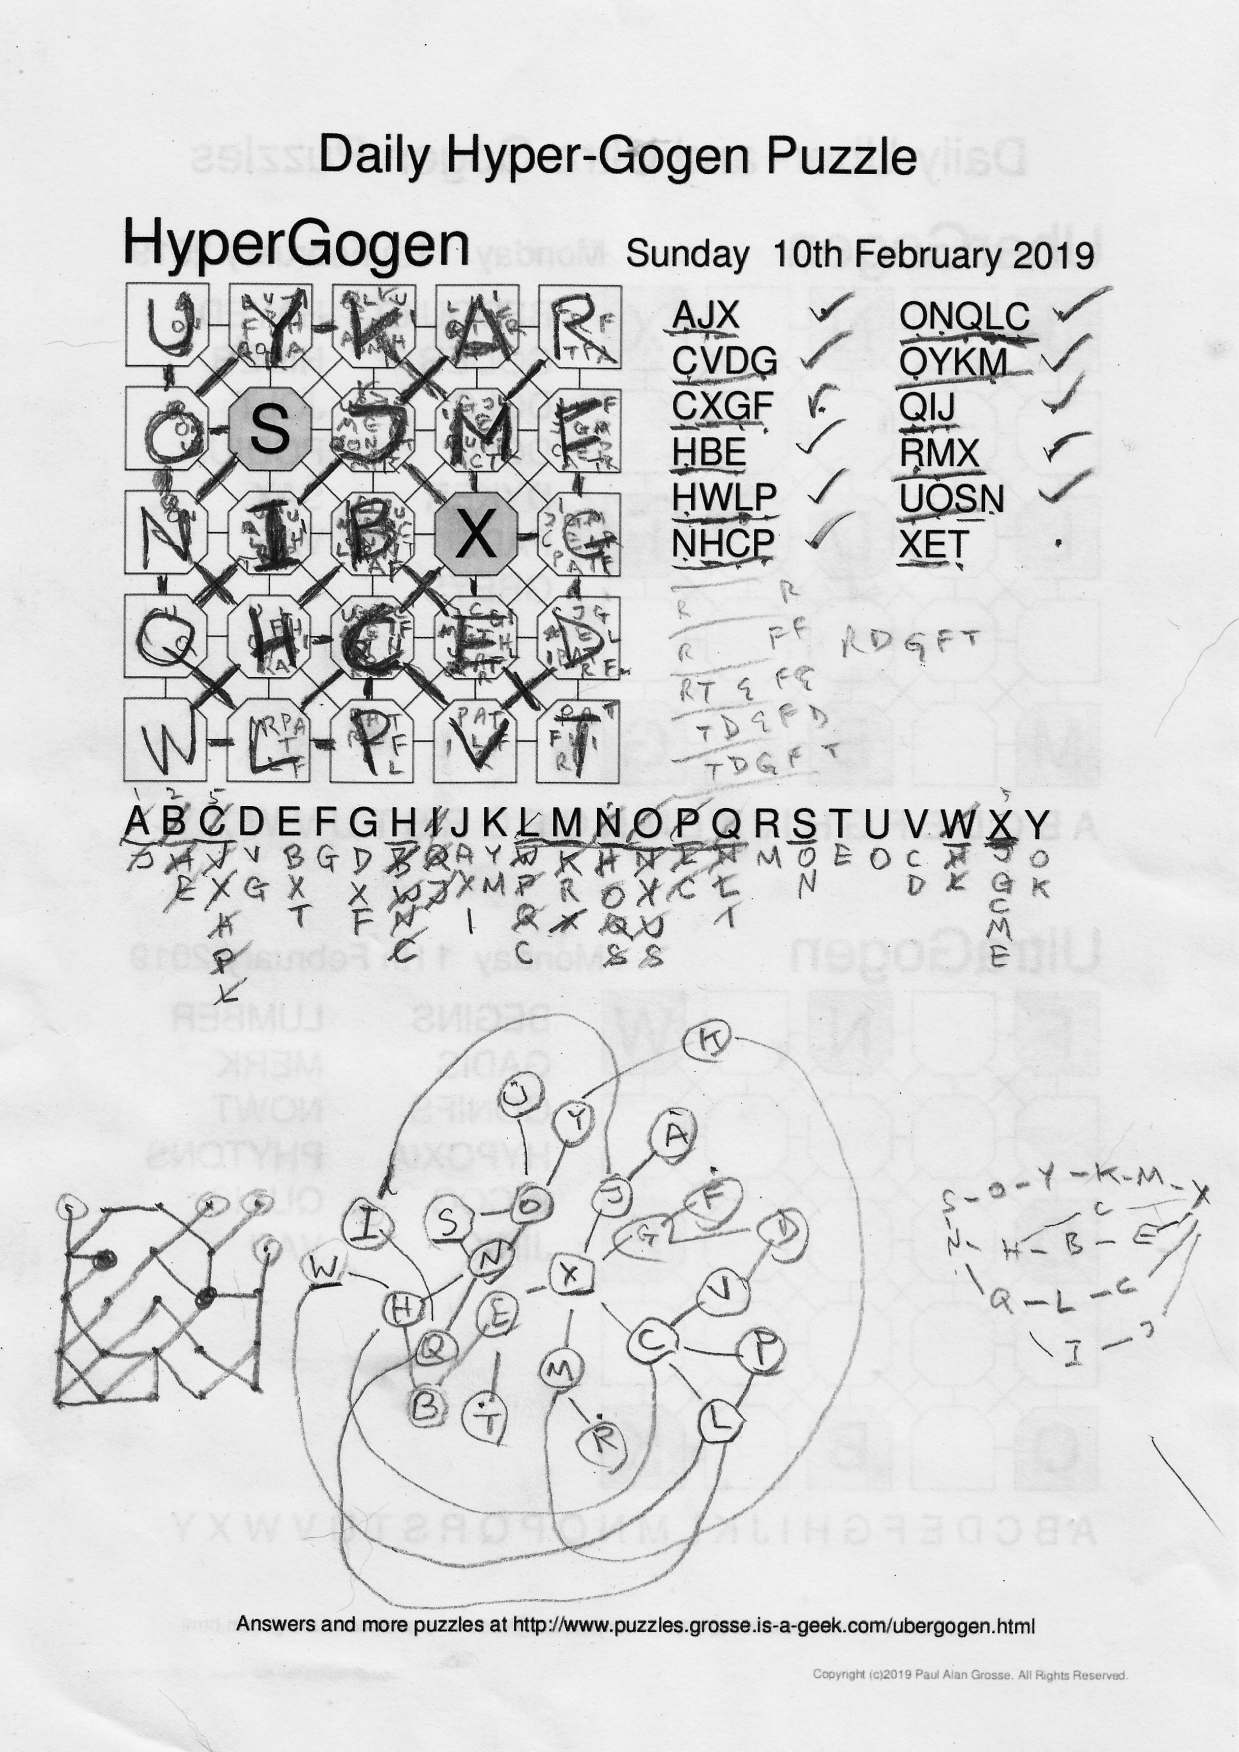
Here, not only can you see that: Hyper-Gogen puzzles with only two clue-letters can be solved; but also, how they can be solved.


|
|
If you want to follow this through for yourself, you can download a copy of the PDF file to print out for youself by clicking here. It prints out onto DIN A4 paper. If you want to look at the above image in more detail, click on it and it will open up in a new tab/window. The first thing that I have done is to mark off on the 'word' list, the letters that I have already - this is kept up-to-date throughout solving the problem. Next, I have used the space below to draw in a map of the letters, linked as they are in the word list - whether it is a Newspaper Gogen or a Uber-, Ultra-, or Hyper-Gogen, the word list is just a series of links between letter-pairs. Following that, I have tried to work out the shortest route between the placed letter clues on the board - as you can see, there is nothing particularly direct. Next, I have written down the letter bonds for each letter in the list below the board - this shows if there are any isolated letters and also, if there are any letters that have more than three bonds (not corners) or more than five bonds (not edges). Then, I have used the known board positions to work out which cells a particular letter can go in, producing areas that letters can appear and perhaps more importantly, where they cannot. Next, There is only one letter that can appear in the corner cell in the bottom-left - a letter 'W'. That is written in there and then I use logic to work out where the other letters go and after the steps that are essentially the same as the steps in the tutorial, You end up with the completed board. One thing that I have done here is to draw in the bonds that are used in the puzzle, repeating it with just the bonds on a diagram in the bottom left of the sheet so you can see how letters are pushed and pulled into the positions they end up in by use of the bonds - in this case, you can see how the rather round-about way that the given letter-anchors allow the loops above and below to be pushed out into a 4x4 loop and the diagonals pull at the other letters apart from the isolated letters - "U", "A", "R" and "F" - pulling into the corner spaces. Essentially, the anchor-letters allow you to define areas that letters can and cannot go until you are left with a cell within which only one letter can go - in the case the 'W' - and then the other letters grow from that corner - the anchor-letters producing an asymmetry that steers the growth of the letters. Finally the furthest extremities can have trailing letters fit the spaces. Look how the diagonal link pattern shows how it has grown from the bottom-left. Note that when these puzzles are produced, every bond is tested for redundancy so, unlike having to use real words, were language produces the same sort of patterns repeatedly thus producing link-redundancy, here, there is no such thing. |
Copyright ©2019-2023 Paul Alan Grosse.